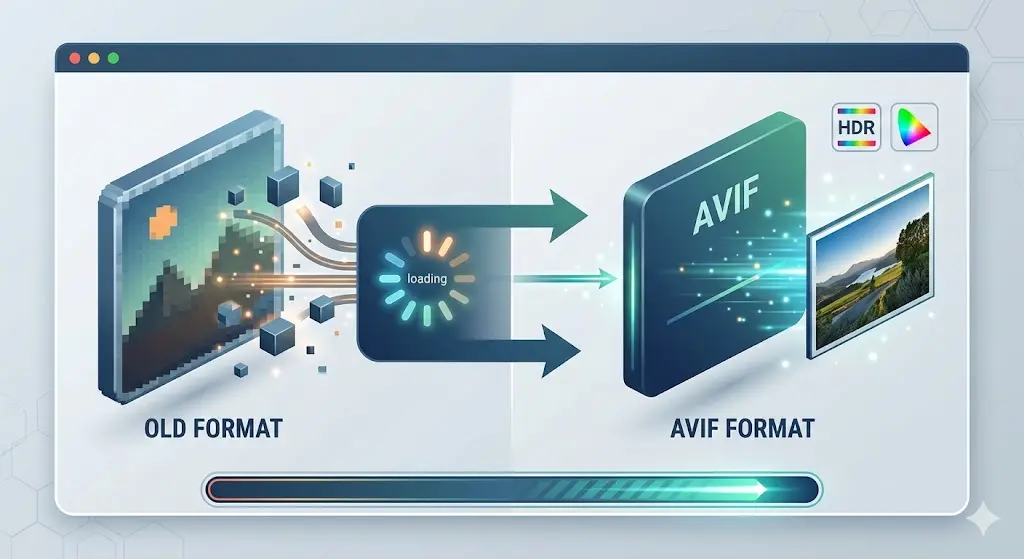
There is a reasonable chance you have heard of WebP. There is also a reasonable chance you have not actually switched to it yet. It has been around since 2010, browser support crossed 97% years ago, and yet the web is still mostly serving JPEGs and PNGs.
This post is the complete technical breakdown: how WebP actually works under the hood, why the compression numbers beat JPEG, where it falls short, and how to deploy it properly in a modern stack. No fluff.
What WebP Is (and Where It Came From)
WebP was created by Google and released in September 2010. The lossy variant is built on top of VP8, the video codec Google acquired when it bought On2 Technologies, specifically the intra-frame prediction technique VP8 uses to encode individual video frames. The lossless variant uses a separate, purpose-built algorithm. Both are wrapped in a RIFF container (the same binary structure used by WAV audio files).
The format supports four distinct modes, which is unusual for a single image format:
- Lossy compression - VP8-based block prediction, smaller files than JPEG at equivalent perceptual quality
- Lossless compression - a spatial prediction algorithm optimized for images, produces smaller files than PNG
- Lossy with alpha - transparency combined with lossy compression in the same file
- Animation - multi-frame sequences, replaces GIF and most APNG use cases
The spec is open and royalty-free. The reference encoder and decoder (libwebp) are released under a BSD-style license. You can use it, implement it, extend it without paying anyone.
How the Compression Actually Works
Lossy WebP
This is where the real performance advantage lives, so it is worth going through the pipeline step by step rather than citing compression percentages and moving on.
Step 1: Color space conversion. Input frames are converted from RGB to YCbCr, luminance channel (Y) separated from two chroma channels (Cb, Cr). The visual system resolves fine luminance detail much better than fine color detail, so the encoder can be aggressive with chroma without the eye noticing. JPEG does this too, but WebP's handling diverges significantly in the next step.
Step 2: Segmentation and intra-frame prediction. The image is divided into macroblocks (16×16 pixels) and further into 4×4 sub-blocks. Before any transform is applied, the encoder predicts the contents of each block from surrounding already-encoded blocks. There are multiple prediction modes - horizontal, vertical, DC (flat fill), TrueMotion - and the encoder tests each one and picks whichever produces the smallest residual error. Only the residual (the difference between prediction and actual pixels) is passed to the next stage. This technique is borrowed directly from video encoding and it is the primary reason WebP beats JPEG at equivalent quality. JPEG has no prediction step at all; it transforms raw pixel values.
Step 3: Discrete Cosine Transform. The residuals are run through a DCT at 4×4 block size. JPEG uses 8×8 blocks. Smaller block size means high-frequency detail at edges is preserved more accurately at the same bitrate. The tradeoff is encoder complexity, but for a still image that is a build-time cost, not a runtime one.
Step 4: Quantization. DCT coefficients below a per-block threshold are discarded. This is where the lossy part actually happens. The quantization matrices in WebP are more sophisticated than JPEG's fixed matrices, they adapt per segment based on visual complexity. Textured areas get finer quantization; smooth gradients can be quantized more aggressively without visible banding.
Step 5: Arithmetic entropy coding. The quantized coefficients are compressed using arithmetic coding. JPEG typically uses Huffman coding. Arithmetic coding is provably closer to the information-theoretic limit of compression, it encodes fractional bits per symbol, where Huffman is constrained to whole bits. On the same data, arithmetic coding reliably achieves 5-10% better compression. On modern CPUs the speed difference is negligible.
The combined effect of prediction, smaller-block DCT, and arithmetic coding: lossy WebP files are roughly 25-34% smaller than JPEG at equivalent SSIM (structural similarity). The gap widens on images with hard edges and fine detail; it narrows slightly on smooth gradients and soft-focus photography.
Lossless WebP
Lossless WebP uses an entirely different pipeline from the lossy variant. It is not VP8 at all, it is a custom spatial prediction system built specifically for photographic images.
The encoder applies up to four reversible transforms before entropy coding:
- Color transform - decorrelates the R, G, B channels to reduce statistical redundancy between them. Natural images have high correlation between channels; removing it makes the remaining data more compressible.
- Subtract-green transform - subtracts the green channel value from both red and blue. Green carries more luminance information than red or blue in typical photos, and this simple operation exploits that correlation.
- Color indexing transform - if the image uses fewer than 256 unique colors, replaces color values with palette indices. Most web graphics hit this case.
- Spatial prediction - 13 different predictors, applied per tile, with the tile map stored in the bitstream. The predictor choice itself is compressed.
After transforms, entropy coding uses a 2D variant of canonical Huffman coding with spatially varying code tables. The result: lossless WebP is typically 26% smaller than equivalent PNG files.
The Alpha Channel
WebP handles transparency more cleverly than PNG. The alpha channel is compressed as a separate lossless bitstream inside the same file, independently from the color channels. The encoder can also optionally pre-multiply alpha into the color values before encoding, which reduces edge fringing when the color channels are lossy-compressed. PNG has no equivalent, transparency is always pixel-perfect but uncompressed at the channel level, which is why PNG files with complex transparency get so large.
Format-by-Format Comparison
WebP vs JPEG
JPEG is the benchmark everything gets compared against for photographic images, and it is not a fair fight anymore.
| Factor | JPEG | Lossy WebP |
|---|---|---|
| File size (same quality) | Baseline | 25-34% smaller |
| Transparency | No | Yes |
| Progressive rendering | Yes (progressive mode) | No |
| Animation | No | Yes |
| EXIF / metadata | Full EXIF / IPTC / XMP | EXIF + XMP |
| Tooling support | Universal | Good in browsers, patchy in editors |
| Decode speed | Fast (hardware decoder) | Slightly slower in software |
The one genuine argument for JPEG: progressive rendering. A progressive JPEG transmits a low-resolution version of the entire image first and sharpens it in passes as more data arrives. For large above-the-fold images on slow connections, users see something immediately rather than a top-to-bottom reveal. WebP has no progressive mode. Whether this matters depends entirely on your users' connection speeds, for most modern sites it is not a dealbreaker, but it is worth knowing.
WebP vs PNG
PNG owns the lossless use case: UI screenshots, diagrams, logos with hard edges, sprites. Lossless WebP competes directly here.
| Factor | PNG | Lossless WebP |
|---|---|---|
| File size | Baseline | ~26% smaller |
| Lossless fidelity | Bit-perfect | Bit-perfect |
| Transparency | Yes (full 8-bit alpha) | Yes |
| Animation | APNG (limited support) | Yes (native) |
| Design tool export | Universal | Figma yes, older Photoshop needs plugin |
| Decode speed | Very fast | Slightly slower |
For web delivery, lossless WebP wins on size every time. For source files and archiving, keep PNG, design tools produce it natively, it is understood everywhere, and bit-perfect fidelity matters when someone else will edit the file later. Convert to WebP at the build or upload step, not earlier.
WebP vs GIF
This comparison is not close. GIF is a 1987 format limited to 256 colors, mandatory dithering for anything photographic, and compression based on LZW, a general-purpose algorithm that was never designed for images. Animated WebP files are 64-70% smaller than equivalent GIFs and support 24-bit color with full alpha. The only reason GIFs survive in 2025 is social platform inertia. For anything you control, there is no defensible reason to choose GIF over animated WebP.
Browser Support
As of mid-2025, WebP support sits at approximately 97.5% of global browser usage according to caniuse.com. Safari added support in version 14 (September 2020), which was the last major holdout. Firefox since 2019. Chrome since 2014.
The practical implication: the 2.5% without support is almost entirely IE11 and legacy Android WebView 4.x, environments where users almost certainly have bigger problems than image format support. You still need a fallback for correctness, but it is an edge case now, not a primary concern.
How to Serve WebP
Option 1: The <picture> element
The semantically correct approach. The browser evaluates <source> elements in order and
picks the first one it can handle:
<picture>
  <source srcset="/images/hero.webp" type="image/webp">
  <img src="/images/hero.jpg" alt="Hero image" width="1200" height="630">
</picture>
The <img> tag is mandatory, it is the fallback and it is what screen readers use. Do
not remove it.
For responsive images, combine with srcset and sizes:
<picture>
  <source
    type="image/webp"
    srcset="/images/hero-480.webp 480w,
            /images/hero-800.webp 800w,
            /images/hero-1200.webp 1200w"
    sizes="(max-width: 600px) 480px, (max-width: 1000px) 800px, 1200px"
  >
  <source
    type="image/jpeg"
    srcset="/images/hero-480.jpg 480w,
            /images/hero-800.jpg 800w,
            /images/hero-1200.jpg 1200w"
    sizes="(max-width: 600px) 480px, (max-width: 1000px) 800px, 1200px"
  >
  <img src="/images/hero-1200.jpg" alt="Hero" width="1200" height="630" loading="lazy">
</picture>
Option 2: Server-side content negotiation
A cleaner approach for high-volume sites. Every image request from a modern browser includes an
Accept header:
Accept: image/webp,image/apng,image/*,*/*;q=0.8Your server can read this and serve the WebP version from the same URL, falling back to the original for clients that do not advertise support. HTML does not change at all.
Nginx:
map $http_accept $webp_suffix {
    default   "";
    "~*webp"  ".webp";
}

server {
    location ~* ^/images/(.+)\.(jpe?g|png)$ {
        add_header Vary Accept;
        try_files $uri$webp_suffix $uri =404;
    }
}
The Vary: Accept header is critical - without it, a CDN in front of your server will cache
the first response and serve it to everyone regardless of their Accept header.
Apache (.htaccess):
RewriteEngine On
RewriteCond %{HTTP_ACCEPT} image/webp
RewriteCond %{DOCUMENT_ROOT}/$1.webp -f
RewriteRule ^(.*).(jpe?g|png)$ $1.webp [T=image/webp,L]

Header append Vary Accept env=REDIRECT_webp
Option 3: CDN-level transformation
If you run behind Cloudflare, Cloudinary, or imgix, let the CDN handle conversion. Cloudflare Polish
converts images to WebP automatically for supporting browsers. Cloudinary does it via
f_auto in the URL. imgix uses auto=format. No HTML or server config changes
required.
Worth noting: CDN transformation comes with a cost per operation. For high-traffic sites it is usually still cheaper in engineering-hours than managing your own pipeline. For smaller sites, doing it at build time is often better.
WebP in Next.js
Next.js handles WebP out of the box via its next/image component. When you use it, the
framework automatically converts source images to WebP (or AVIF, if the browser supports it), generates
multiple responsive sizes, adds lazy loading by default, and reserves layout space to prevent Cumulative
Layout Shift.
import Image from 'next/image'

export default function Hero() {
  return (
    <Image
      src="/images/hero.jpg"
      alt="Hero"
      width={1200}
      height={630}
      priority
      sizes="(max-width: 768px) 100vw, 1200px"
    />
  )
}
Configure output formats in next.config.js:
module.exports = {
  images: {
    formats: ['image/avif', 'image/webp'],
    deviceSizes: [640, 750, 828, 1080, 1200, 1920],
    imageSizes: [16, 32, 48, 64, 96, 128, 256, 384],
  },
}
AVIF first means Next.js serves AVIF to browsers that support it and WebP to browsers that support WebP but not AVIF. The JPEG or PNG fallback is implicit. Your source file can stay as JPEG or PNG, Next.js converts at request time and caches the result.
For build-time conversion (static export or custom pipelines), use Sharp:
import sharp from 'sharp'
import { glob } from 'glob'

const files = await glob('public/images/**/*.{jpg,jpeg,png}')

for (const file of files) {
  const out = file.replace(/\.(jpe?g|png)$/, '.webp')
  await sharp(file)
    .webp({ quality: 80, effort: 6 })
    .toFile(out)
}
effort controls the compression speed/ratio tradeoff: 0 is fastest, 6 is smallest. For a
build step, use 6 - it runs once, not on every request.
When WebP Is Not the Right Choice
WebP is the right default for web delivery in almost every scenario. But there are real exceptions:
- Source and archive files. Keep master copies as PNG or TIFF. WebP lacks the ecosystem of editing tools for asset management. Convert at the last step before delivery, not earlier.
- Files that will be opened outside a browser. Sending a file to a client who will open it in Windows Photo Viewer or an older version of Photoshop? JPEG is safer. WebP support outside browsers is still patchy, Microsoft added native WebP to Windows 10 in 2020, and older Photoshop versions require a plugin.
- Print workflows. WebP is RGB-only. Print workflows require CMYK. JPEG or TIFF are the right choices here.
- Screenshots with large flat-color areas. Lossless PNG can occasionally beat lossless WebP on highly-indexed images. Test both on your specific content before deciding.
Real Numbers: What to Actually Expect
Benchmarks vary depending on image content. Here is a realistic range based on common web image types:
| Image type | vs JPEG | vs PNG | Notes |
|---|---|---|---|
| Product photos (e-commerce) | 30-40% smaller | - | Hard edges on white backgrounds compress particularly well |
| Hero / full-width photography | 20-30% smaller | - | Soft-focus images show less improvement |
| Blog thumbnails | 25-35% smaller | - | Significant at scale across hundreds of posts |
| UI screenshots / diagrams | - | 15-30% smaller | Use lossless mode - lossy artifacts are visible on text |
| Logos with transparency | - | 20-40% smaller | Lossy WebP with alpha is often acceptable for web logos |
| Animated images (GIF replacement) | - | - | 60-70% smaller than GIF, dramatically better quality |
These are rough ballparks. The only way to get accurate numbers for your specific images is to test them. Convert a batch of your actual production images to WebP at quality 80 and compare, ten minutes of testing beats any benchmark table.
The Practical Workflow That Makes Sense in 2025
- Keep originals as JPEG or PNG. Do not discard source files.
- Convert to WebP at quality 75-85 before publishing. For photos, 80 is a reliable default. For images with text or hard edges, 85.
- Use the
<picture>element with WebP as first source and the original as fallback. - Set
loading="lazy"on everything below the fold. Usepriorityorfetchpriority="high"only for the single LCP image. - Set explicit width and height on all images. Unrelated to WebP but prevents layout shift and improves LCP timing.
If you are on Next.js, steps 2-4 are handled by next/image. You just need to settle on
quality settings in next.config.js and move on.
Convert Your Images to WebP - Free
Upload any PNG, JPEG, or GIF and get a WebP file back in seconds. No account, no server upload, everything runs in your browser.
Convert to WebP Free